A Quick Look at Construction of a South Carolina Hoop Dome
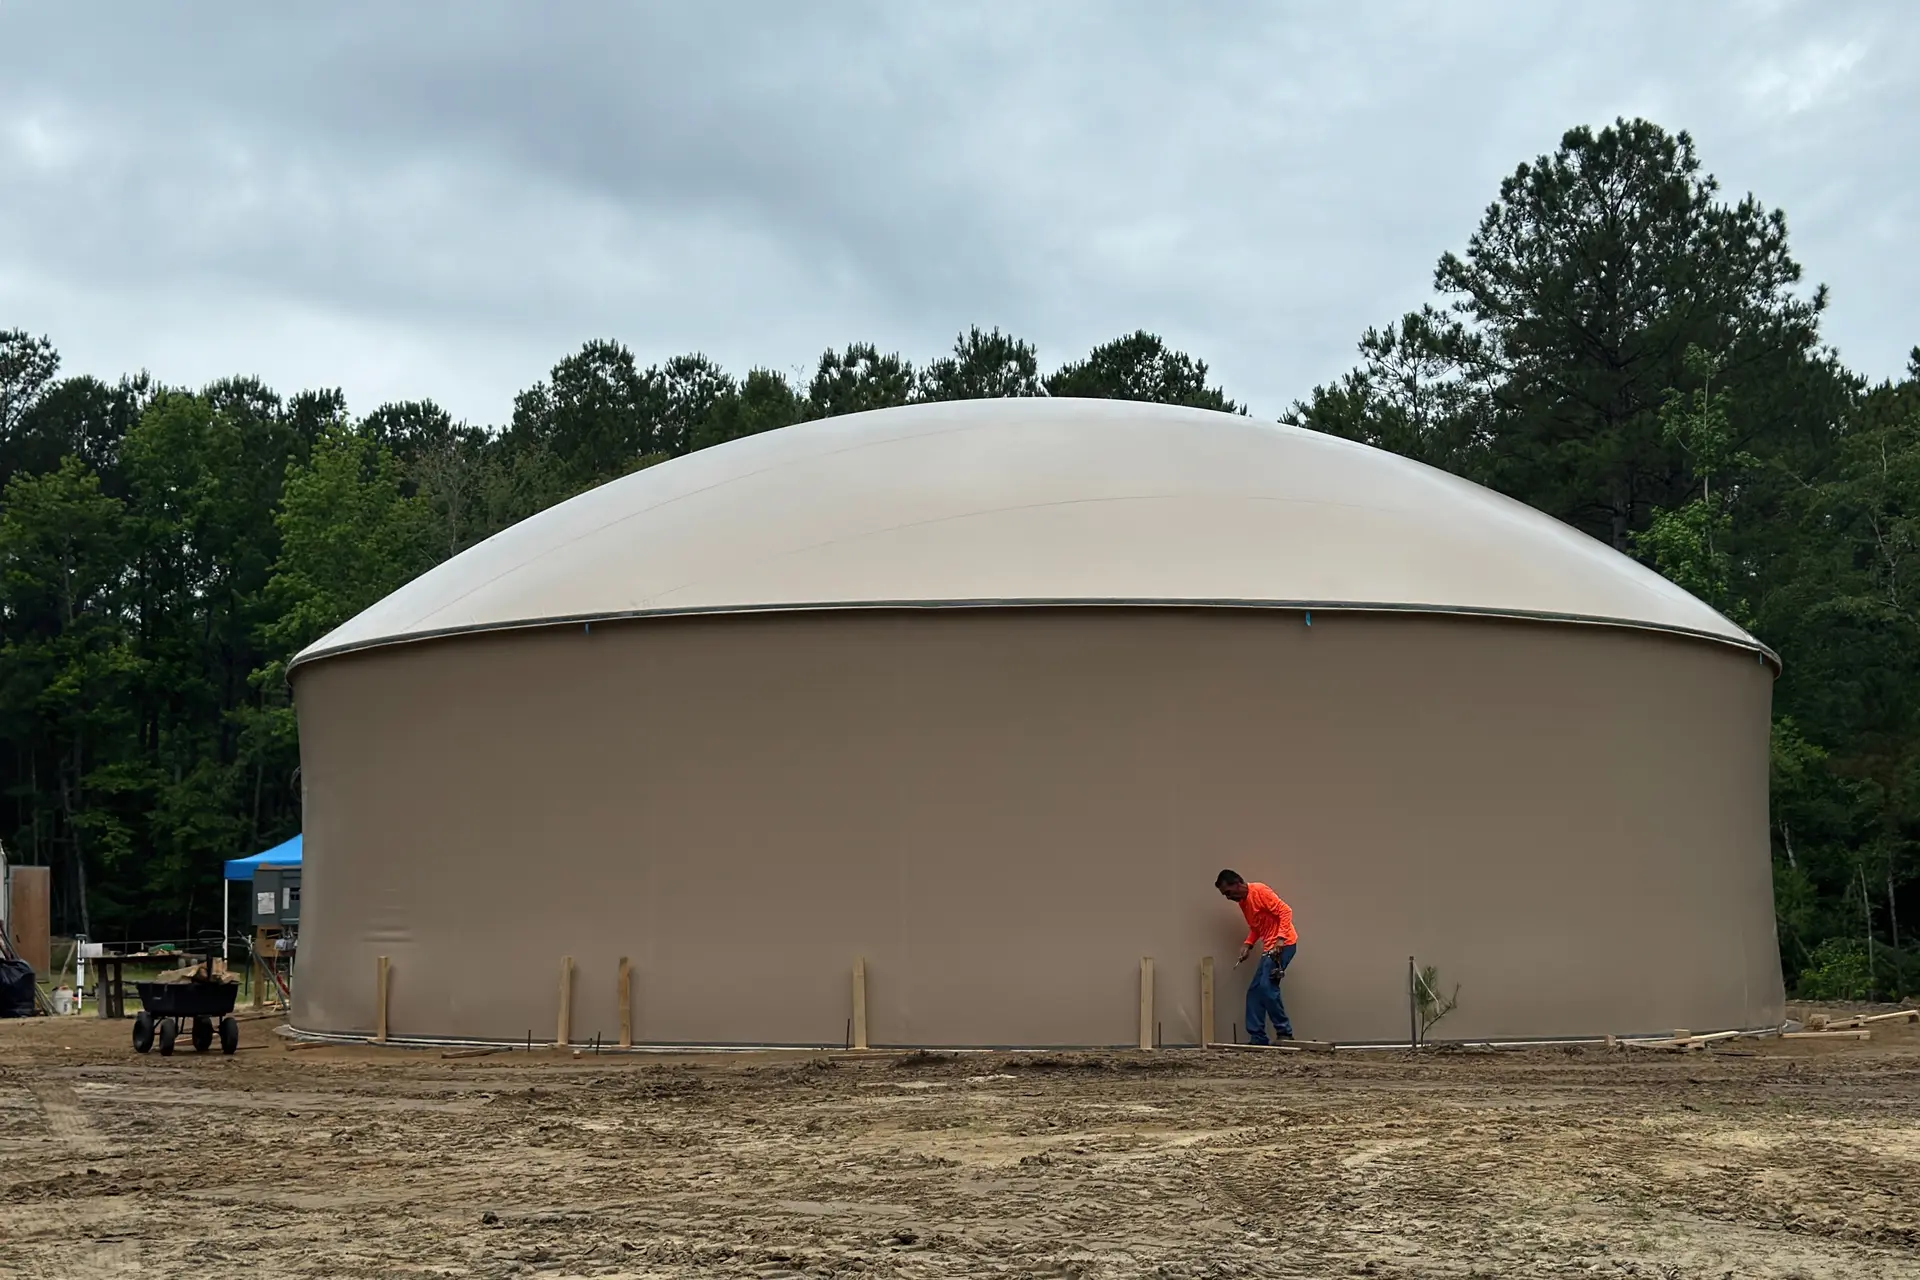
A Hoop Dome is a Monolithic Dome constructed with a Transition Ring Airform Membrane.
Javier Figueroa / Monolithic Commons / CC BY-SA 4.0
Monolithic superintendent Javier Figueroa took some great photos during the construction of a ring-beam footing and the attachment and inflation stages of a 55-foot dome in South Carolina.
The foundation for the dome is pretty standard. Sometimes, we pour footings integrated with a slab floor, but when it comes to domes this size and up, we usually pour the slab floor after the dome is complete.
What makes this job special is the use of a Transition Ring Airform membrane (TRAM), used to construct a hoop-style Monolithic Dome (or a hoop dome for short).
A TRAM facilitates using traditional Monolithic Dome construction techniques to build a dome with a fully integrated, vertical stem wall. This type of Monolithic Dome is becoming more and more popular. For instance, I built a hoop dome as an addition to my house a few years ago.
TRAMs are delivered to the site in three parts: the stemwall membrane, the dome membrane and a structural steel ring which is used to join the two membranes together before inflation.
Scroll down to see how the inflation turned out. As a bonus, I included two photos of the stainless steel anchor point we installed on this dome. These anchor points make it easy to use safety lines while performing regular exterior maintenance.
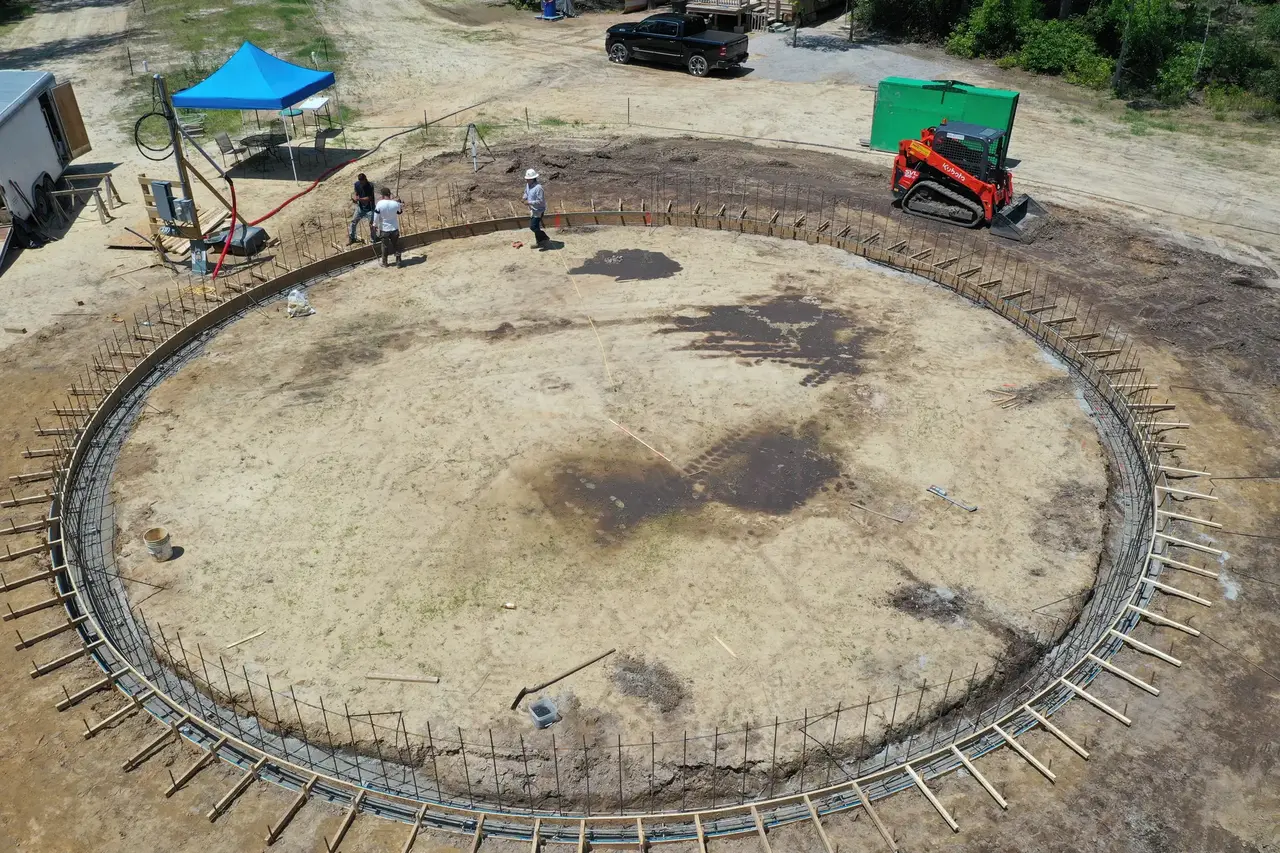
A ring-shaped trench has been lined with steel. The rebar that will attach to the dome’s structural steel is standing up along the inner circumference of the trench. The next step is to pour concrete into the trench and wooden forms which create a step up around the exterior perimeter. For this building, we will wait to pour the slab floor until after the dome structure is complete.
Javier Figueroa / Monolithic Commons / CC BY-SA 4.0
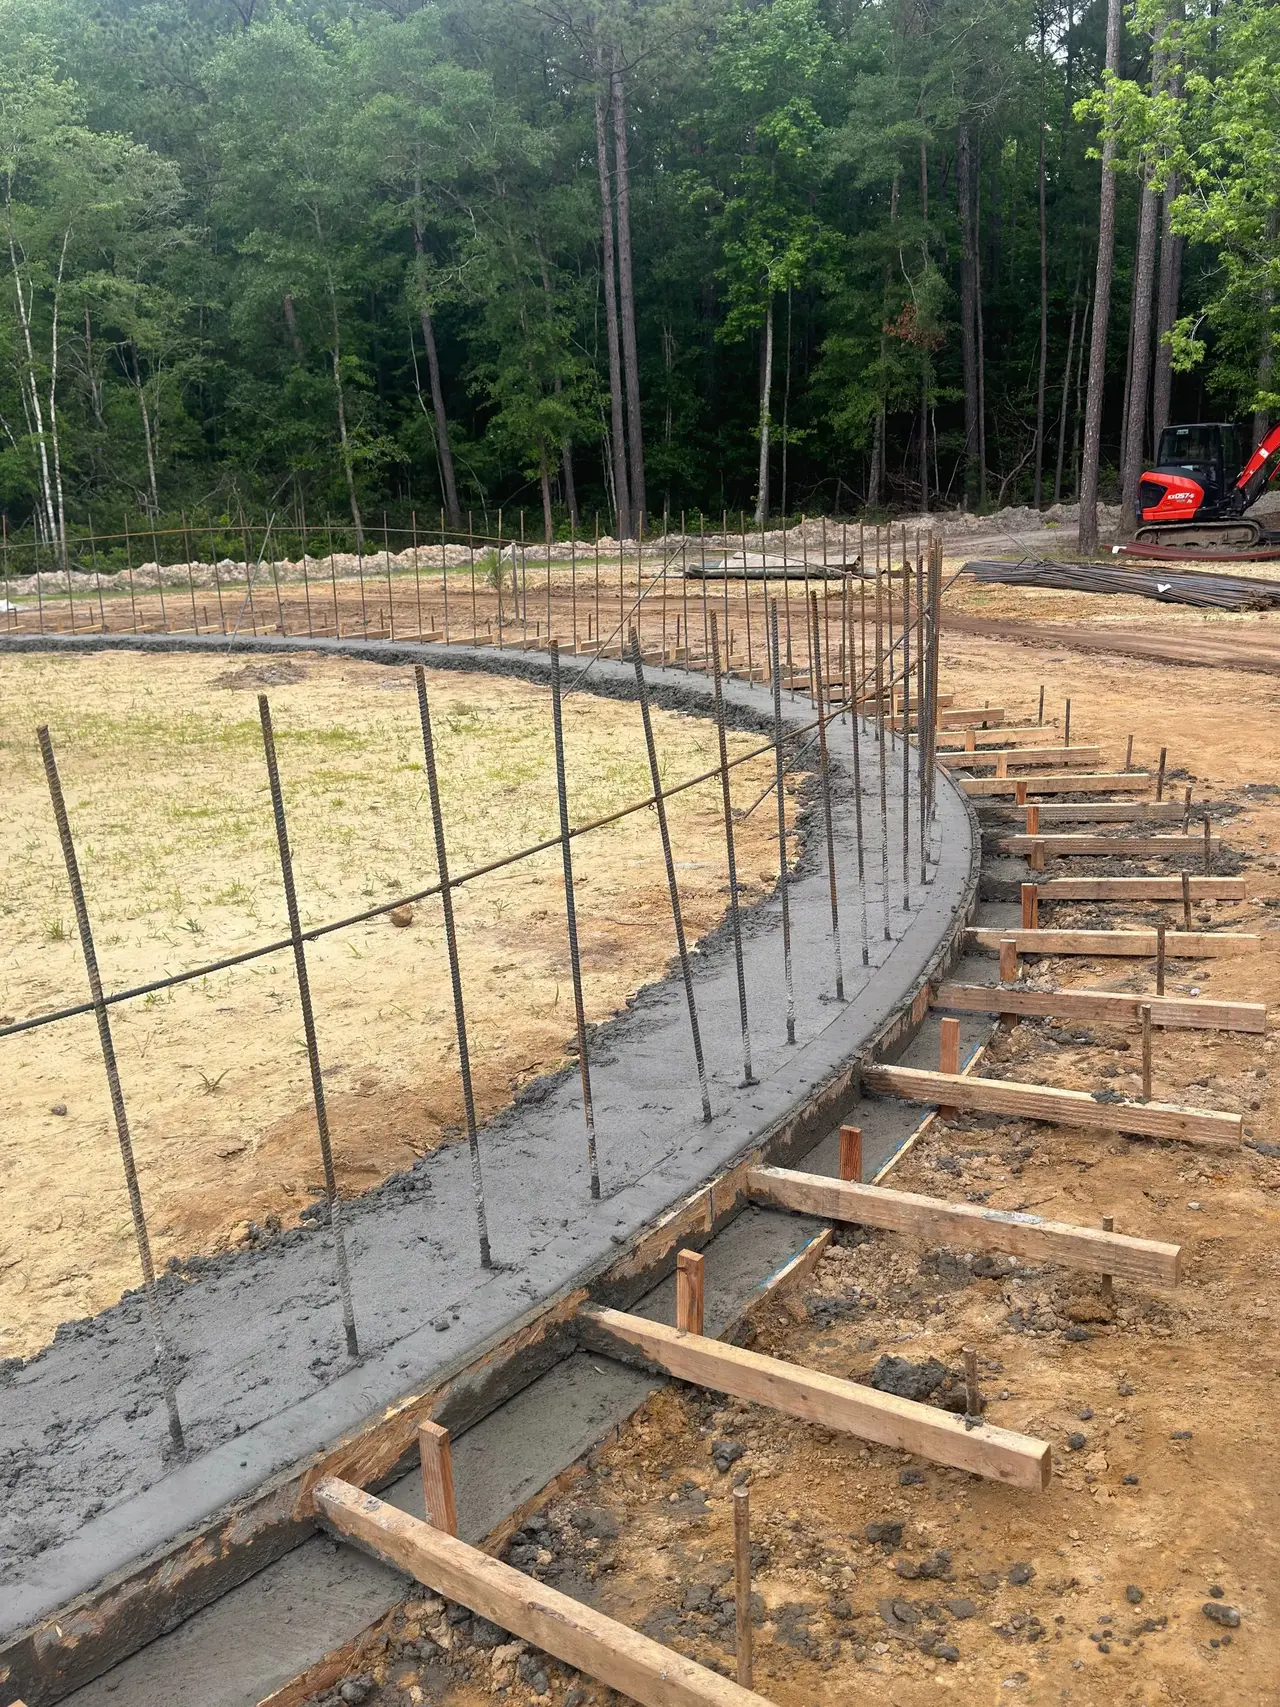
The concrete for the footing is still wet. Once the concrete sets, the footing is finished, and construction can proceed. Notice the wooden forms creating a curb or a step along the perimeter. The Airform attaches to the outer side of the step.
Javier Figueroa / Monolithic Commons / CC BY-SA 4.0
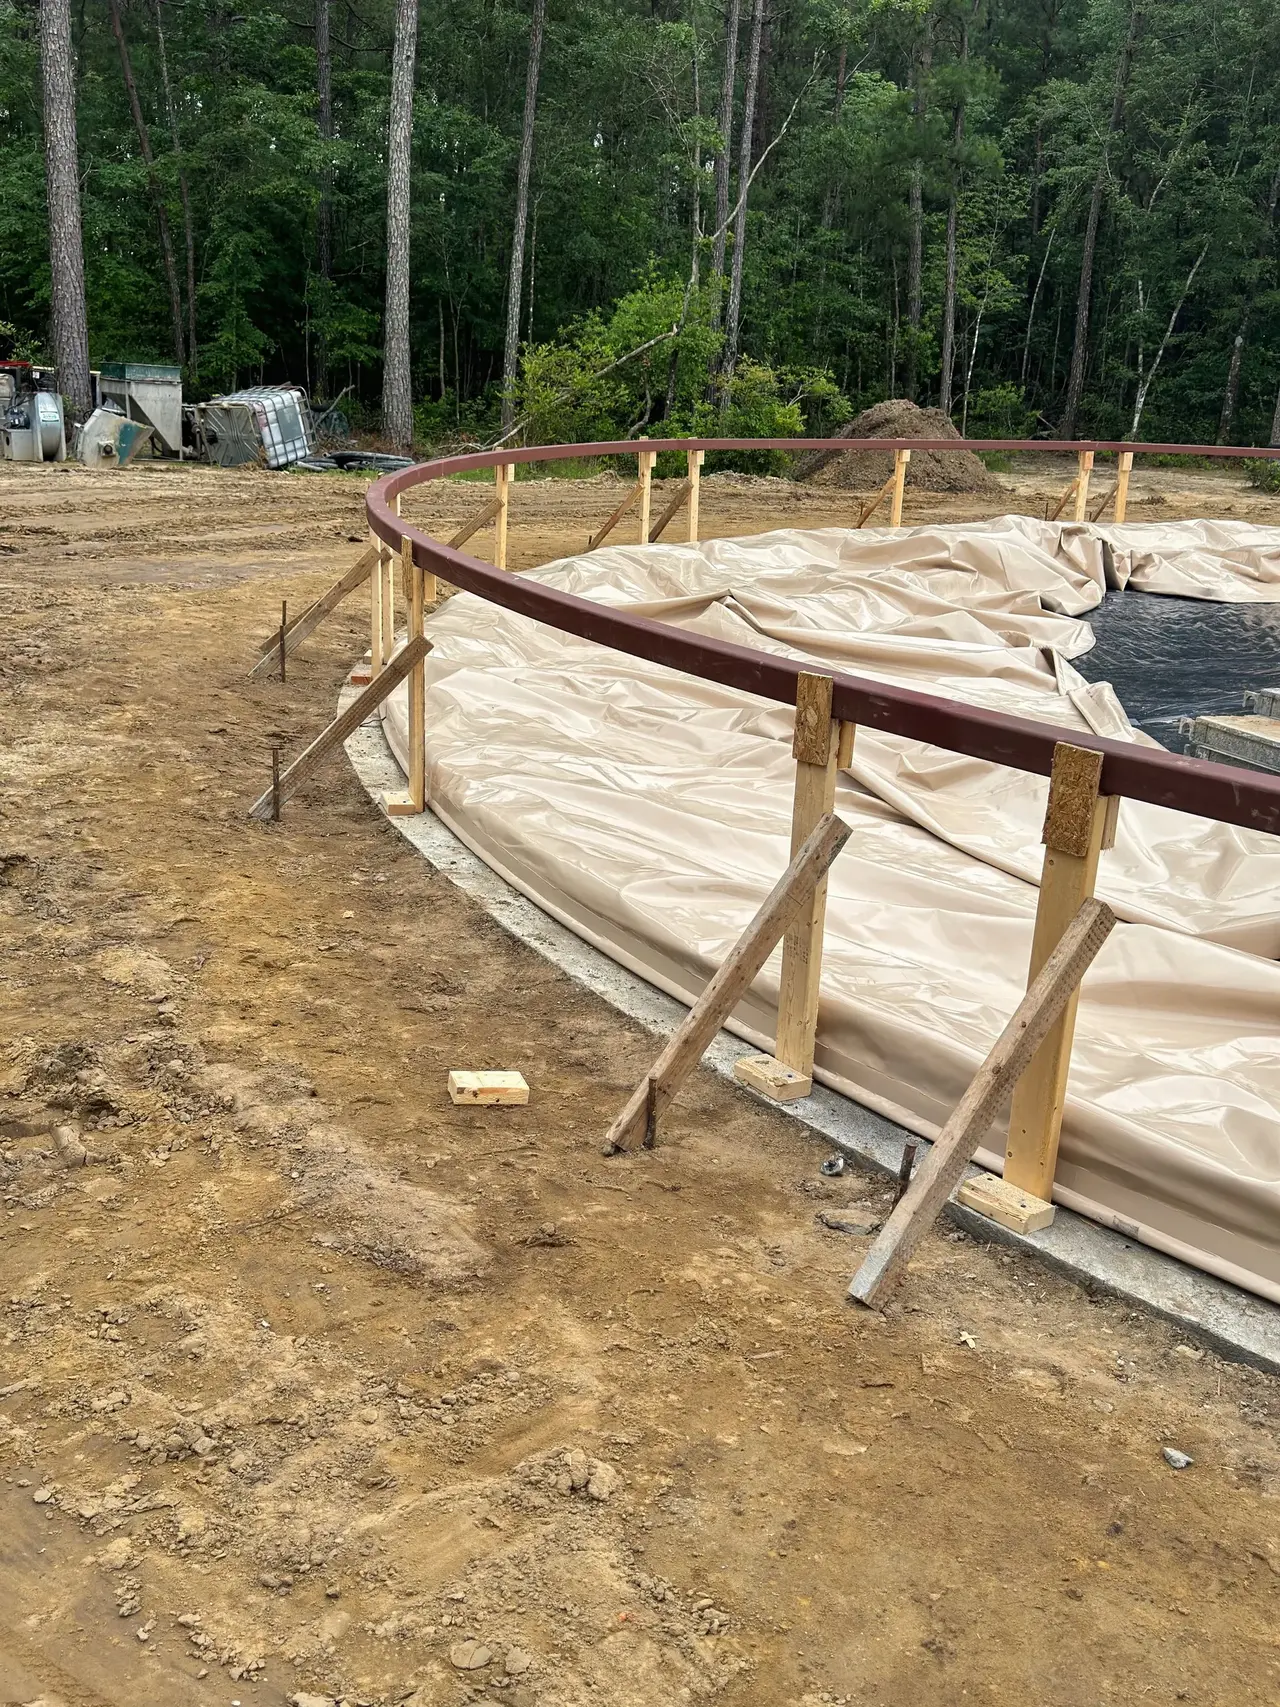
The stemwall membrane (the stemwall portion of the Airform) has been attached to the curb of the ring beam footing. Temporary wooden stanchions hold up a steel hoop used to join the top of the stemwall membrane to the bottom of the dome membrane (the arched upper portion of the Airform).
Javier Figueroa / Monolithic Commons / CC BY-SA 4.0
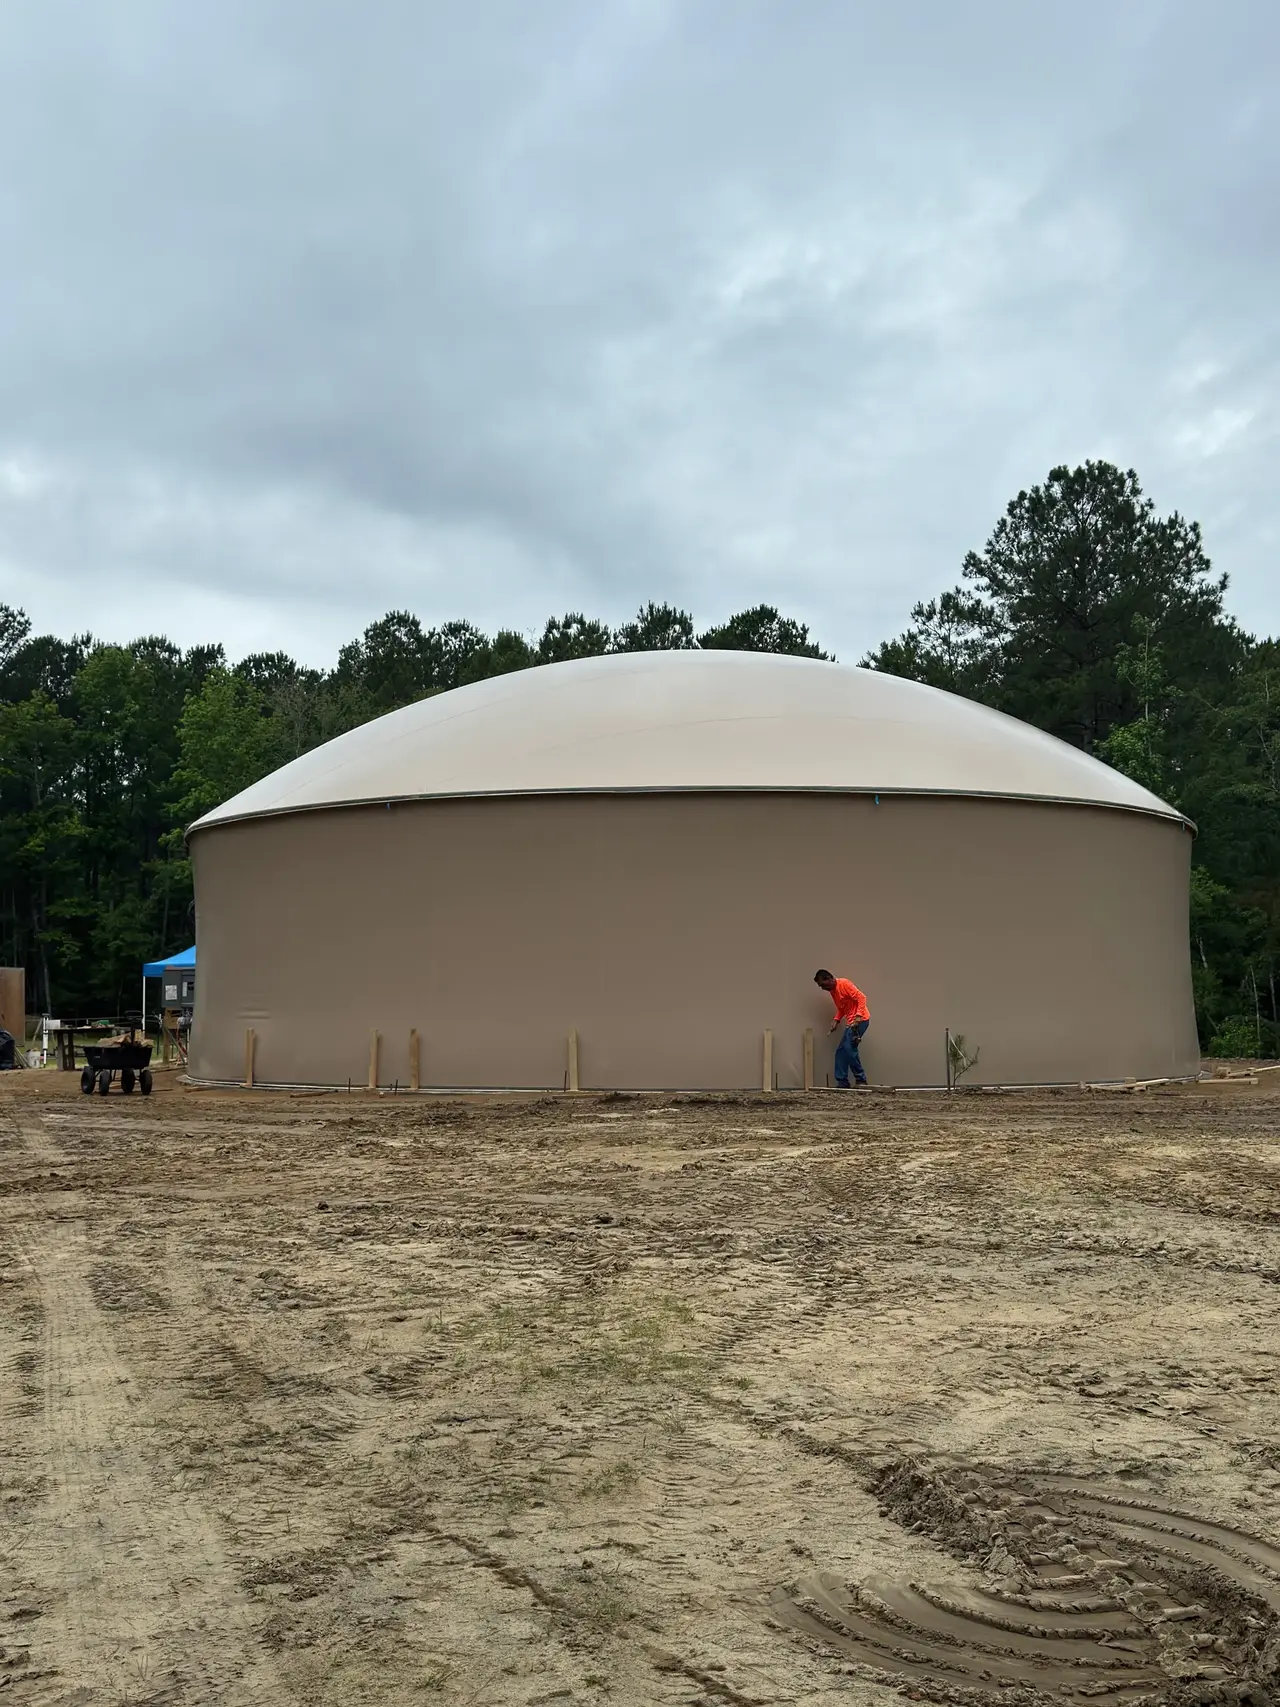
After the two halfs of the Ariform are attached to the steel hoop, we slowly inflate the Airform to a low psi. Next, the crew carefully inspects the structure and removes the wooden stanchions. Note the hourglass shape of the stemwall; once the dome is inflated to its ultimate air pressure, the stemwall will straighten up.
Javier Figueroa / Monolithic Commons / CC BY-SA 4.0
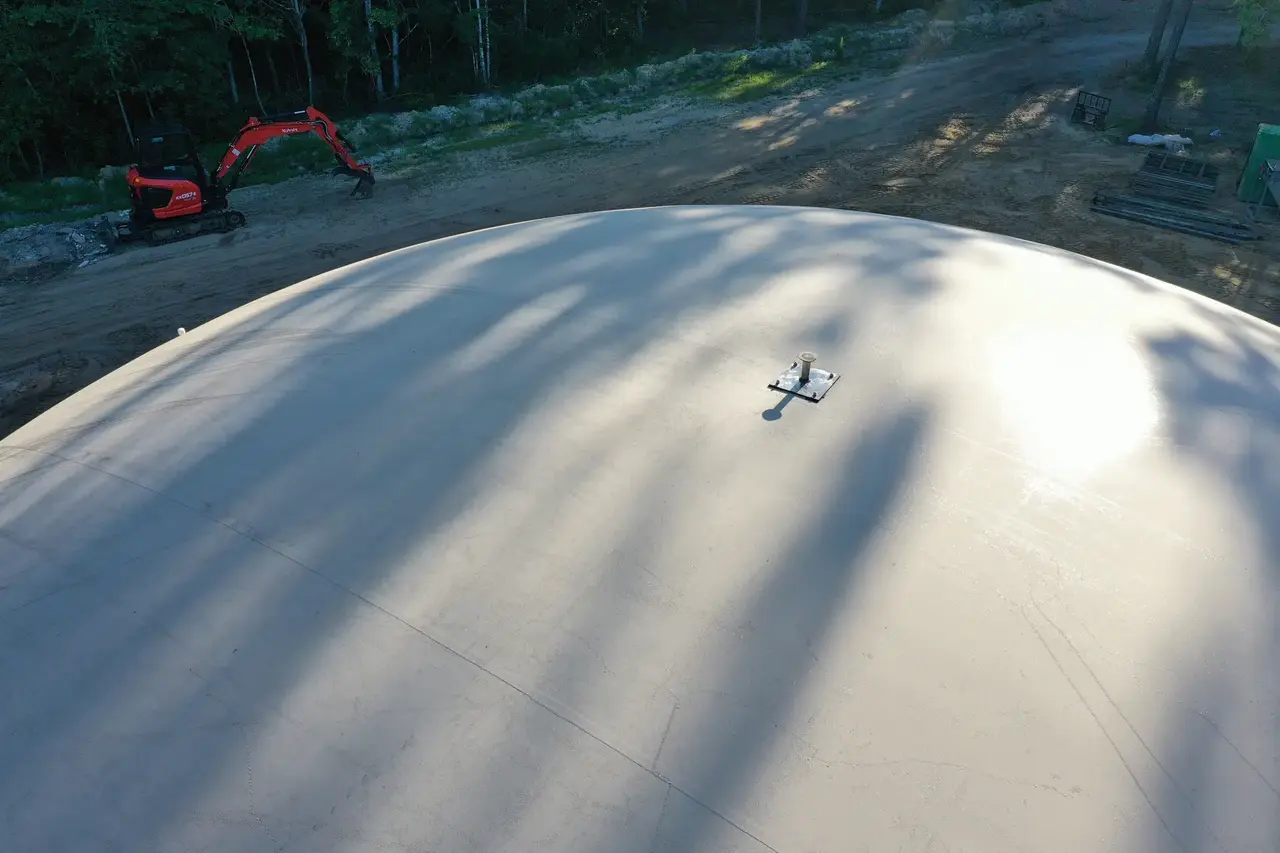
A stainless steel anchor point has been tied directly into the dome’s structural steel and is now a permanent feature. Anchor points provide owners and workers a place to attach safety lines when washing, painting or performing other maintenance tasks on the exterior of Monolithic Domes.
Javier Figueroa / Monolithic Commons / CC BY-SA 4.0
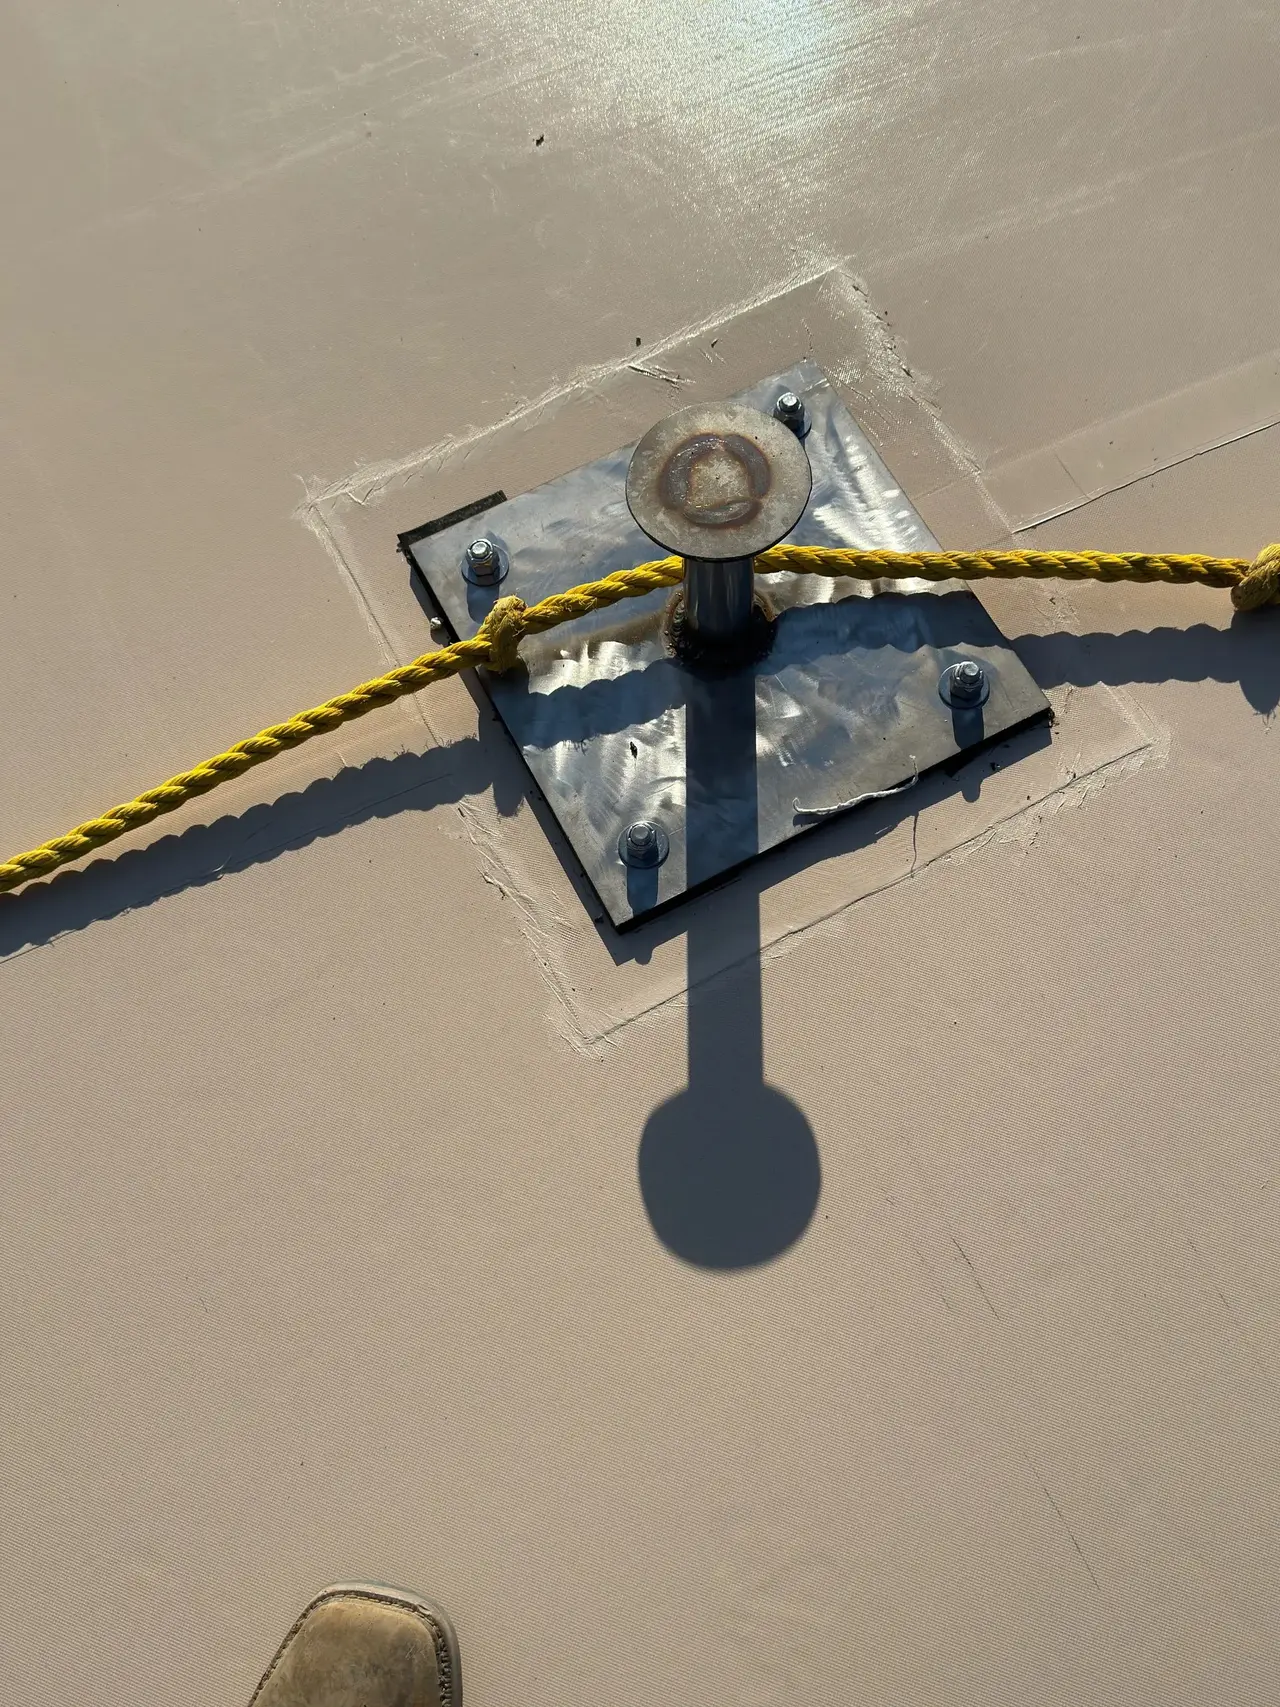
The access point is engineered to meet OSHA safety requirements for tying off and working on a Monolithic Dome’s exterior. Regular maintenance of the Airform is critical to the longevity of the dome.
Javier Figueroa / Monolithic Commons / CC BY-SA 4.0